
Queen vs Passed Pawn Part 1 - Central Pawn
In several situations, especially pawn races, one side promotes to a queen, while the other side has a pawn one square away from queening. If the stronger side is to move, how do they win?
Introduction
In several situations, especially pawn races, one side promotes to a queen, while the other side has a pawn one square away from queening. If the stronger side is to move, how do they win? In this 5-part series of analysing this endgame, we will explore all the scenarios that can result from this, and in what situations the stronger side is winning, and in what situations can the defending side hold.
In part 1, we will analyse the case where the defending side's passed pawn is a central pawn --- that is, a d or e pawn. 99% of the time this situation is winning for the attacking side, and is easiest to win. Let's take a sample case:
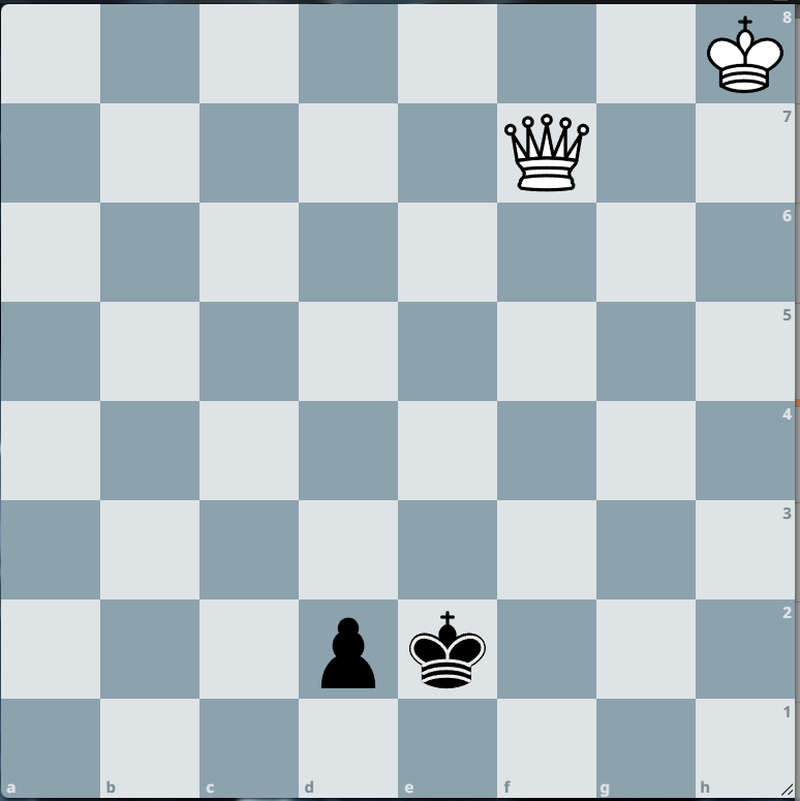
Here we have taken a d pawn for black, but even if it is an e pawn it is the same story.
Step 1
Step 1 is to bring the queen closer to the action, and the only way is through checks, as we cannot afford any wasted time. Several checks are there, but we'll proceed with Qc4+ as we are getting closer.
There are several responses for black, and you will continue to check the black king while making process. After a couple moves you will reach a position similar to the position reached when Black plays Kf2 immediately. I want to start here as there is a systematic pattern of moves that you will make in order to make progress.

Step 2 - Carrying out the Sequence
Please pay attention to this following series of moves, as it works 100% of the time and is guaranteed to win in the most efficient way.
We play Qd3, attacking the pawn and also covering the promotion square through x ray. Albeit not a check, this move is okay as black cannot promote the pawn (otherwise we take it). Black is forced to play Ke1, defending the pawn and threatening promotion.
Now, we play Qe3+, which is a very important check. We are checking the king and keeping an eye on the pawn. Black is forced to play Kd1 (Kf1 loses the pawn), but in doing so they are blocking the promotion square.
This is a key moment --- now that Black cannot promote the pawn due to their King blocking the square, we make use of this tempo by advancing our own king. We do not need to touch the queen, as no checks are required. We play Kg7.
Are you keeping track of the position? If it's difficult, please refer to the attached study link posted, and you can follow along. For some of the experienced players, I'd encourage trying to visualise the position, as it will help greatly.
Now, Black has two choices. Kc1 helps us to improve our king further as Black's pawn is pinned, and they are not threatening to promote yet. They will have to play Kc2 to try and threaten promotion, so let's consider the case where Black plays Kc2 directly instead of going via c1.
Several ways win, but again follow my pattern. We play Qe2, pinning the pawn and forcing black to respond. The pawn cannot promote due to being pinned, and if Black wants to hold on to the pawn they have to play Kc3 or Kc1.
If they play Kc3, you will simply play Qd1. This way, the pawn is moving nowhere and the king cannot force your queen out of d1. Make advantage of this by advancing your king and winning the d pawn, followed by swiftly checkmating the Black king. So, Black has to play Kc1.
We then play Qc4+, and this check is very important. We are trying to limit Black's possibilities, and to make progress Black has to play Kb2 or Kb1.
Establishing a Pattern
Are you noticing something? We have just played a series of checks and a king move, but after the king moves to b2, doesn't this look awfully like the position we started with after Black played Kf2 all those moves ago?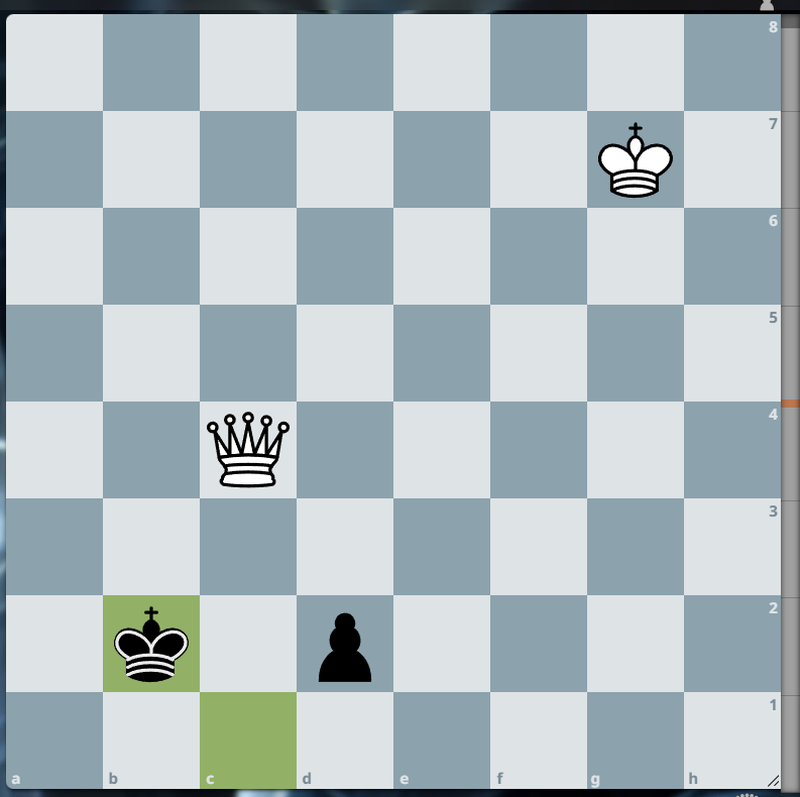
Except now it is just mirrored. We continue with Qd3, employing the same strategy as before.
Note that if Black played Kb1, Qd3+ is still the move to play, and the resulting ideas will be the same as before.
Step 3 - Repeat
We now have established the pattern. The positions will mirror themselves each time, but you should be able to carry out these moves with ease after understanding the pattern and intent behind what we are doing. Whenever the black king steps in front of the pawn, make use of that time to advance your king.
Step 4 - Finish Black Off
Midway through the fourth repetition of this cycle, you will obtain this position just after you advanced your king and Black plays Ke2.
As per our established pattern, we should play Qc2, pinning the pawn. However, now that our king is close enough, we can go directly for the kill. We can play Qe3+. If Kf1, we take the pawn on d2 and mate in a couple of more moves. If Kd1 then we play Kd3, and the d pawn is now a goner. We will capture the d pawn next and mate quickly.
Thank you for reading! Stay tuned for further blog posts, especially on this series.
You may also like
 matstc
More Puzzle Themes!
Fancy tactics categories that are elegant and maybe helpful. GM Avetik_ChessMood
10 Things to Give Up to Enjoy Chess Fully
Discover how embracing a lighter mindset can help you enjoy chess again and achieve better results. FM MathiCasa
Chess Football: A Fun and Creative Variant
Where chess pieces become "players" and the traditional chessboard turns into a soccer field BigBrainChess_08
Beautiful Puzzles and Studies 4/7
Can you solve this tricky mate in 3 puzzle? Find out below!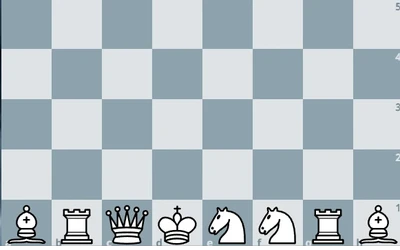 BigBrainChess_08
Mathematics in Chess - Combinatorics
Maths and chess are very interwoven, and there are several examples of this. Learn about one such ex… BigBrainChess_08